Home Decorating Tips


Home Decorating Tips
Surface Preparation Tips for Damp Walls
Posted on October 12, 2021
Last updated May 27, 2025
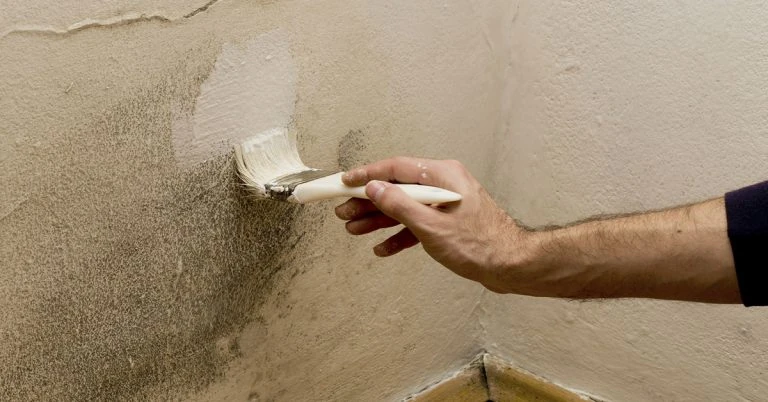
Noticing signs of dampness on your walls, such as peeling wallpaper, dirty surfaces, and even mold (to name a few), can be one of the most disappointing scenarios you can encounter as a homeowner.
Damp is classified as either condensation (triggered by poor heating and ventilation that increases humidity in a building), rising damp (occurs when water moves upward from the ground and into your structure), or penetrative damp (happens when water enters walls from faulty roofs and pipes or from underground). If left unaddressed, any of these types of damp can destroy plaster and masonry, and timber decay, and promote the development of unhealthy mold.
While the presence of damp can be a setback for a paint project, with the right knowledge and tools, you can get rid of it and prep your surface for painting (or repainting). Find out how to remove dampness from walls and ensure you have a ready surface for your next paint job.
How to Prepare Damp Surfaces for Painting
Because damp makes your walls wet, you’ll need to clean surfaces first before applying paint on them. A moist or damp surface will prevent paint from sticking to it and even re-stain your walls.
When addressing damp walls, you’ll need to know first where the problem came from. Check walls, floors, or ceilings, especially inside basements or bathrooms, to see if they’re cold or wet, exhibit a musty smell, have dark or discolored spots, peels, cracks, or show mold or mildew. Inspect windows as well for condensation. These are some of the most common indicators of damp inside a home.
You can also try the foil test to check for condensation, or if you’re unsure why there’s dampness on the wall. First, dry a part of the wall with a fan heater, then tape a piece of foil over it. Wait for 24 hours before checking again. If the piece of foil is wet, then it means you’re dealing with condensation.
Once you’ve figured out the source of damp, follow these next steps and prepare your surface:
- Remove objects like frames and paintings, molding, baseboards, and /or wallpaper.
- Dry out the area for a week with the help of a humidifier or heavy-duty fan, and by opening doors and windows. At the same time, watch out for wet patches.
- If mold has developed, apply treatment on the affected area according to package instructions. You can also contact a professional who can guide you in solving this dilemma.
- When the wall is already dry, place wall putty on some cracks and holes, sand the surface until smooth, and apply a damp seal or a stain blocker paint that aims to prevent stains from seeping through.
- Once the surface is dry enough, get your paint and other gear ready.
Anti-Condensation Paint for Walls: Possible Benefits
You can also consider using anti-condensation paint on basements, entrances, and bathrooms if your homes are prone to this issue. Its main purpose includes reducing condensation (as its name implies), preventing moisture formation, repelling water, and providing thermal insulation.
One drawback to using anti-condensation paint is that it’s a little more expensive compared to usual interior paint. You may want to look into other methods if you’re on a tight budget. More importantly, remember that anti-condensation paint will just help you mitigate moisture or condensation-related issues, but not completely eliminate or stop it from forming altogether.
How to Get Rid of Wall Moisture or Dampness: Other Ways to Try
Aside from removing certain items from your wall to get rid of dampness, look into these other ways to address the issue and prevent it. These tips may even help you way before you’re preparing your walls for a brand new coat of paint:
- Close gaps on your windows and door frames, and fix faulty roofs to prevent leaks.
- Have a professional fix leaks, especially if plumbing is involved.
- If you have radiators at home, don’t block them with furniture.
- Don’t overload towel warmers with damp towels or items.
- Open your windows when you can.
- When cooking, cover pots and pans with their lids to reduce condensation.
- Invest in a dehumidifier that’ll help combat moisture in the air.
- Dry your laundry outdoors or use a tumble dryer when needed.
- Inspect your floorboards and check if there’s enough space underneath that’ll cause moisture to evaporate from the ground and pass through vents.
Don’t let damp walls stress you out – you can still fix them so they’ll be gone for good. Now, are you ready to turn a damp wall around and give it a fresh coat of paint? With Island Premium Paints, you can!
As the first local paint with a Product Satisfaction Guarantee, your walls and other surfaces will surely get an upgrade when you use them for your projects. Once you have a surface that’s ready for a fresh coat of paint, head to Island Premium Paints and be inspired thanks to various home improvement and decoration inspiration today.
Sources:
https://www.rd.com/article/damp-walls-whats-the-problem/
https://www.homebuilding.co.uk/advice/how-to-treat-damp
https://www.diy.com/ideas-advice/dealing-with-damp/CC_npcart_400241.art
https://www.permagard.co.uk/anti-condensation-paint
https://www.doityourself.com/stry/things-to-consider-when-buying-anti-condensation-paint
https://www.idealhome.co.uk/diy-and-decorating/how-to-get-rid-of-damp-185033
https://www.homeserve.com/uk/living/plumbing-and-drainage/how-to-treat-damp-walls-before-painting/
https://www.dampcoltd.co.uk/latest-news/difference-rising-penetrative-damp
https://www.homepainterstoronto.com/2020/06/08/why-fresh-paint-peels-off-walls/
https://www.checkatrade.com/blog/how-to/treat-damp-walls-before-painting/
https://www.permagard.co.uk/advice/how-to-check-for-damp-in-properties-before-you-buy
Our Products
Our line of high quality paints and products will give your home or project the vibrancy it needs.
Explore Colors
Ready to explore colorful possibiliies today? View our popular paint colo combination palettes for great color schemes and room design ideas for interior and exteriors.


